For many, the rhythmic bounce of a basketball, the swish of the net, and the electrifying energy of the court are more than just a game; they're a passion, a way of life. But what happens when the court is under repair, or you're simply stuck indoors, yearning for that connection to the hardwood? I found myself in that exact predicament once. The thought struck me: why not channel this love for the game into art? I grabbed a sketchbook and decided to draw. At first, the idea seemed challenging; I had never thought to merge my love for sports with drawing, but the image of the basketball itself was so iconic, so compelling.
This journey led me to discover the immense satisfaction of creating a realistic basketball drawing. Whether you're a seasoned artist looking for a new subject or a complete beginner, perhaps a young artist eager to get started, this comprehensive guide is for you. We're here to walk you through the process, step by step, transforming simple shapes into a vibrant, three-dimensional representation of this American icon. So, grab your sketchpad and pencils, as we're about to embark on a thrilling journey through the art of the hardwood, learning how to draw a basketball with ease and precision.
Table of Contents
- The Allure of Basketball Drawing
- Essential Tools for Your Basketball Sketch
- The Foundation: Simple Shapes for Your Basketball
- Adding Depth: Lines, Texture, and Detail
- Bringing It to Life: Color and Shading Techniques
- Beyond the Basics: Advanced Tips and Inspiration
- Common Challenges and How to Overcome Them
- Your Artistic Journey Continues: Practice and Share
The Allure of Basketball Drawing
Basketball isn't just a sport; it's a global phenomenon, and the basketball itself is arguably one of the most recognizable sports symbols worldwide. It’s the only piece of mobile equipment needed to play the game, and its distinct appearance makes it a fascinating subject for artists. Did you know that basketball is the only major sport that originated entirely in America? This rich history and its status as an American icon add another layer of appeal to learning how to draw a basketball. Whether you're a game enthusiast, a child, or a newbie to the art world, capturing this iconic symbol on paper offers a unique blend of challenge and satisfaction.
Many people falsely assume that drawing is easy, but it has challenges no matter how simple your subject may seem. However, with the right guidance, the process of creating a compelling basketball drawing can be incredibly rewarding. It allows you to connect with the sport on a different level, transforming your appreciation for the game into a tangible piece of art. This lesson is super easy and meant for younger artists, but the principles apply to anyone eager to find out how to draw a basketball. It’s a simple basketball sketch tutorial that promises to demystify the process and unlock your artistic potential.
Essential Tools for Your Basketball Sketch
Before we dive into the steps of creating your perfect basketball drawing, let's ensure you have the right tools. You don't need an elaborate art studio; simple, accessible materials are often the best starting point. Here’s what you’ll need to grab your sketchpad and pencils:
- Pencils: A range of graphite pencils (e.g., HB for sketching, 2B or 4B for shading and darker lines).
- Eraser: A good quality kneaded eraser or a vinyl eraser for clean corrections.
- Paper: Standard drawing paper or a sketchpad.
- Color Medium (Optional but Recommended): Basic orange colored pencils, markers, or acrylic paints if you plan to add color. As the data suggests, you can use "acrylic paint or any medium of your choice."
- Blending Tool (Optional): A blending stump, tortillon, or even a cotton swab for smooth shading.
Having these tools ready will make your basketball drawing experience much smoother and more enjoyable. Remember, the goal is to have fun and express your creativity!
The Foundation: Simple Shapes for Your Basketball
Every great drawing begins with a strong foundation, and for a basketball, that foundation is surprisingly simple: the circle. To draw a ball on flat paper, we start with a simple circle. This initial step is crucial for establishing the correct proportions and overall shape of your basketball. We'll explore two methods to help you get started, catering to different preferences and skill levels.
Method One: The Basic Circle Approach
This method is straightforward and perfect for beginners. It focuses on getting the primary shape down quickly and accurately.
- Start with a Circle: To start drawing a basketball, begin with a simple circle that represents the ball’s outer shape. Don't press too hard with your pencil; these are just guide lines that you can easily erase later. You can freehand it, or if you prefer, use a compass or a circular object (like a roll of tape) to trace a perfect circle. This ensures your basketball drawing has a perfectly round base.
- Establish the Center Lines: Once you have your circle, the next step is to draw a vertical and a horizontal line down the middle. These lines will act as your equator and prime meridian, helping you accurately place the distinctive lines of the basketball later on. They also help you visualize the ball's three-dimensional form on a two-dimensional surface.
This approach provides a solid, symmetrical starting point for your basketball drawing, making it easier to add details in subsequent steps.
Method Two: Building from the Ground Up
For those who prefer a slightly more organic approach or want to understand the form more deeply, this method involves building up the circle from lighter strokes.
- Light Sketching: Instead of one solid circle, use a series of light, overlapping circular strokes to gradually build up the shape of your basketball. This allows for more flexibility and correction as you refine the roundness. Think of it as gently "feeling out" the circle.
- Refine and Darken: Once you're satisfied with the overall roundness, gently darken the most accurate outline, letting the lighter construction lines fade into the background.
- Add Guide Lines: Similar to Method One, draw a vertical and a horizontal line down the middle. These lines are essential for orienting the basketball's characteristic seams.
Both methods achieve the same goal: a perfectly round base for your basketball drawing. Choose the one that feels most comfortable for you. The key is to get that initial circle right, as it dictates the overall appearance of your finished art piece.
Adding Depth: Lines, Texture, and Detail
With the basic circular shape established, it's time to bring your basketball drawing to life by adding its iconic lines and realistic texture. This is where the ball truly begins to take on its familiar appearance, moving beyond a simple sphere to a recognizable piece of sports equipment.
Mastering the Iconic Lines
The line pattern on the basketball divides it into quarters and is crucial for its identity. These lines are not perfectly straight on a spherical surface; they curve to follow the form of the ball.
- Curved Lines: Next, draw 2 curved lines at the top and bottom halves of the ball. These lines should connect to the vertical line you drew earlier, creating the distinctive "figure-eight" pattern that defines a basketball. Imagine them wrapping around the sphere.
- The "Seams": In addition to the main vertical and horizontal lines, basketballs have additional "seams" that extend from the central intersection. These are typically two curved lines that run parallel to the main vertical line, creating the four distinct panels of the ball. Pay attention to the subtle curvature of these lines as they follow the contour of the ball.
- Line Thickness: The lines on a real basketball are slightly raised. When drawing, you can represent this by making your lines a bit thicker or by adding a very subtle shadow along one side of each line to suggest depth.
These lines are what make a basketball a basketball. Take your time to get them right, as they will define the structure of your basketball drawing.
Crafting Realistic Texture
A basketball isn't perfectly smooth; it has a pebbled, grippy texture. Adding this texture is key to making your basketball drawing look realistic.
- Subtle Stippling or Dots: To create the pebbled texture, you can use very small, light dots or tiny, irregular circles across the surface of the ball. Don't make them too uniform; randomness will make it look more natural.
- Varying Pressure: Apply varying pressure with your pencil. Areas that are in shadow might have a slightly denser texture, while highlighted areas will appear smoother or less textured.
- Avoid Overdoing It: The texture should be subtle. Overdoing it can make the ball look fuzzy or dirty. The goal is to suggest the texture, not to draw every single pebble. Remember to "add to the drawing before you color" if you're working with pencils first, ensuring your texture is established before the final color application.
This step truly elevates your basketball drawing from a flat image to a three-dimensional object, inviting the viewer to almost feel its surface.
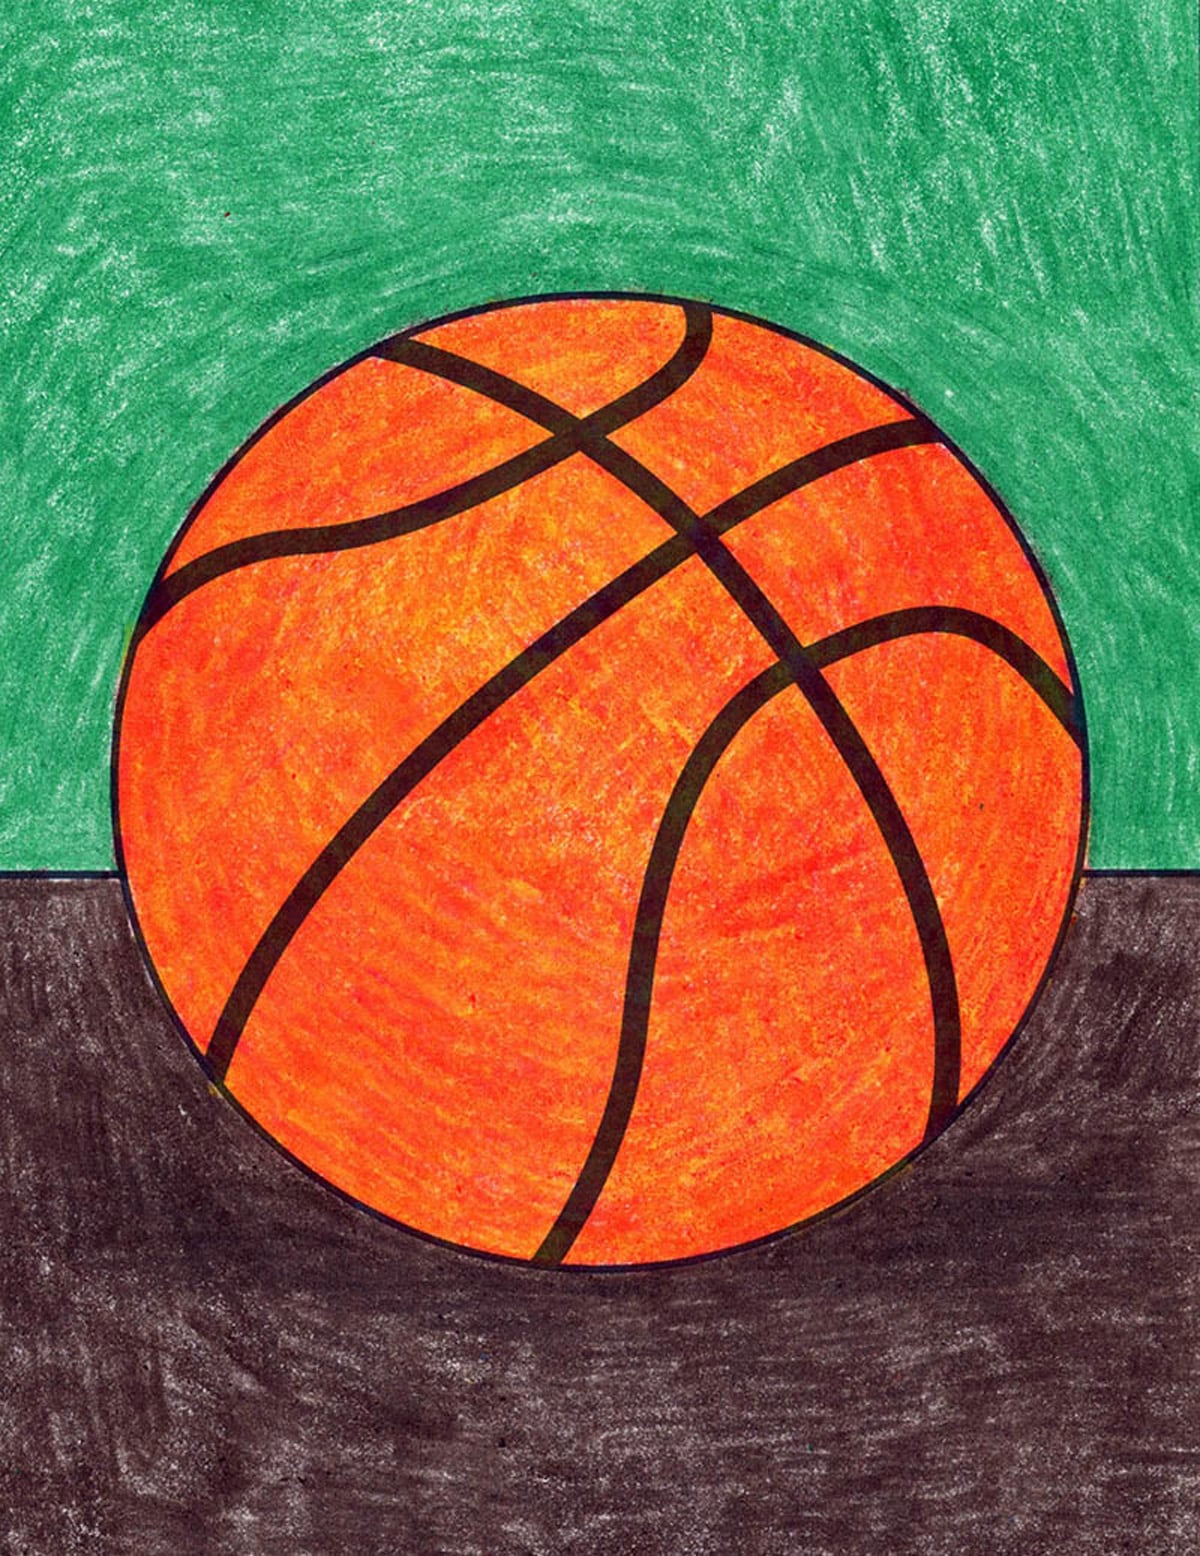
Bringing It to Life: Color and Shading Techniques
Color and shading are what transform your outline and texture into a vibrant, lifelike basketball. This is where you add depth, dimension, and realism, making your basketball drawing pop off the page.
The Art of Orange: Basic Coloring
The iconic orange of a basketball is instantly recognizable. But it's not just one flat orange; it's a spectrum of tones.
- Basic Orange Base: First, color in the ball with a basic orange. Apply an even, light layer to establish the overall hue.
- Layering for Depth: Don't press too hard. You'll be layering colors to create depth. Think about where the light source is coming from.
- Consider Your Medium: If you're using colored pencils, layer lightly. If using paint, ensure an even base coat. Remember, you can "follow the detailed instructions and examples using acrylic paint or any medium of your choice."
This initial color layer sets the stage for the magic of shading.
Shading for Dimension: Light and Reflection
Shading is crucial for making your basketball drawing appear three-dimensional. It simulates how light interacts with the ball's curved surface.
- Identify Light Source: Before you begin shading, decide where your light source is coming from. This will determine where the highlights and shadows fall.
- Lighter Orange for Highlights: Use a lighter orange on areas where light is being reflected. These are your highlights, the brightest parts of the ball.
- Darker Tones for Shadows: Gradually introduce darker shades of orange, or even a touch of brown or muted red, in the areas opposite the light source. These are your core shadows. The edges of the ball furthest from the light will also be darker, creating a sense of roundness.
- Blend the Colors Together: The key to realistic shading is smooth transitions. Blend the colors together seamlessly using a blending stump, cotton swab, or by gently layering and rubbing with your finger (if using colored pencil). This creates a gradient from light to dark, making the ball appear round.
- Cast Shadow: Don't forget the cast shadow beneath the ball. This grounds your basketball drawing and further enhances its three-dimensionality. The shadow will be darkest closest to the ball and gradually fade out.
Mastering color and shading can take some practice, but it's incredibly rewarding. This sporty tutorial helps you learn how to draw a basketball in just a few easy steps, focusing on these vital elements.
Beyond the Basics: Advanced Tips and Inspiration
Once you've mastered the fundamentals of basketball drawing, there are many ways to elevate your art and explore new possibilities. Learning how to draw a realistic basketball can be approached with various methods, and here are some ideas to push your skills further:
- Explore Different Angles: Don't always draw the ball head-on. Experiment with drawing it from different perspectives – from above, below, or at an angle. This will challenge your understanding of perspective and form.
- Add Motion: A basketball in play is dynamic. Consider adding motion lines or a subtle blur to suggest movement, making your basketball drawing more exciting.
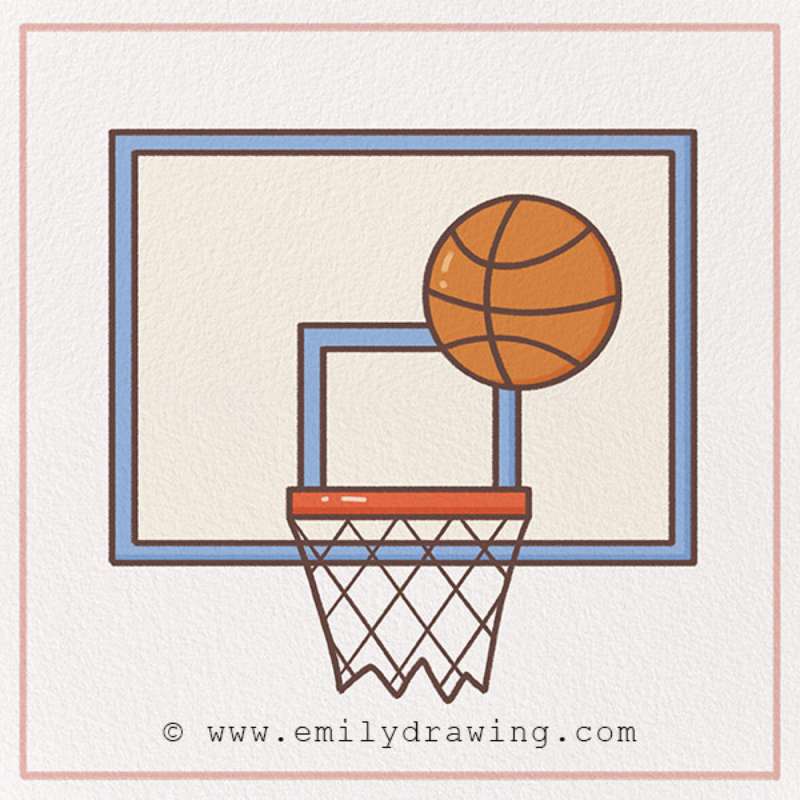
- Contextualize Your Drawing: Place the basketball in a scene. Is it on a court? In a locker room? Being held by a player? Adding a background or other elements can tell a story.
- Experiment with Mediums: While we discussed pencils and acrylics, try other mediums like watercolors, pastels, or digital art. Each medium offers unique textures and effects.
- Study Real Basketballs: Observe how light hits a real basketball in different environments. Pay attention to the subtle variations in color and texture.
- Seek Inspiration: Find and save ideas about basketball drawings on Pinterest or other art platforms. Welcome to the ultimate collection of 25+ basketball drawing ideas! Seeing how other artists approach the subject can spark new ideas for your own basketball drawing.
- Digital Tools: If you're into digital art, there are even free browser apps to easily draw, animate, and share basketball plays, offering a different dimension to your creative expression.
Remember, the goal is continuous learning and enjoyment. Don't be afraid to experiment and push your boundaries. You might even find free PDF tutorials and coloring pages online to practice your skills further.
Common Challenges and How to Overcome Them
As with any artistic endeavor, you might encounter some challenges when learning how to draw a basketball. It's important to remember that drawing is a skill that develops with practice, and encountering difficulties is a natural part of the learning process. Many people falsely assume that drawing is easy, but it has challenges no matter how simple your subject may seem.
- Perfecting the Circle: Getting a perfectly round circle can be tricky, especially freehand.
- Solution: Practice drawing circles repeatedly without lifting your pencil. Use your entire arm, not just your wrist. For beginners, it's perfectly fine to use a compass or trace a circular object initially.
- Accurate Line Placement: Making the curved lines look natural on a sphere can be difficult.
- Solution: Think of the lines as wrapping around a ball, not just drawn on a flat surface. Use very light guide lines first, then darken them once you're confident. The line pattern on the basketball divides it into quarters, so visualize those sections.
- Realistic Shading: Achieving smooth gradients and convincing highlights/shadows takes practice.
- Solution: Start with very light pressure and build up layers gradually. Use blending tools to smooth out transitions. Observe how light falls on real spherical objects around you. Don't be afraid to use a lighter orange on areas where light is being reflected and blend the colors together slowly.
- Adding Texture Without Overdoing It: Creating the pebbled surface without making it look messy.
- Solution: Use light, small, irregular dots or tiny circles. Focus on suggesting the texture rather than drawing every single detail. Vary the density of the texture based on light and shadow.
- Patience and Frustration: Feeling discouraged if your first attempts aren't perfect.
- Solution: Remind yourself that drawing is a journey. Austin and I are learning how to draw a basketball, and we hope you're going to follow along with us, understanding that progress comes with persistence. Don't compare your beginning to someone else's middle. Enjoy the process, and celebrate small improvements.
Remember, every artist, no matter how skilled, started somewhere. Embrace the challenges as opportunities to learn and grow. This basketball drawing lesson is perfect for young students looking to get started with drawing, emphasizing simplicity and enjoyment over immediate perfection.
Your Artistic Journey Continues: Practice and Share
Congratulations! You've taken significant steps in learning how to draw a realistic basketball. From sketching a simple circle to adding intricate lines, texture, color, and shading, you've gained valuable skills. Whether you followed the 6 simple steps with a printable PDF guide or delved into the 17 easy steps, the core principles remain the same: observation, patience, and practice.
The journey of an artist never truly ends. The more you practice, the more your skills will improve, and the more confident you'll become. Throw some hoops with us today, not on the court, but on paper! Continue to learn how to draw a realistic basketball the easy way, following along with various tutorials and examples. As one of the most iconic sports symbols, basketballs are great for creating artwork that celebrates the game, and your newfound ability to draw them opens up a world of creative possibilities.
We hope this guide has been informative and inspiring. Now it's your turn! Share your basketball drawing creations with us in the comments below. What challenges did you face, and what was your favorite part of the process? Your insights can help others on their artistic journey. Don't forget to explore other drawing tutorials on our site to keep your creative momentum going. Happy drawing!