Squirrels are familiar and adorable small, furry animals that dart through our parks and backyards, gathering nuts with an endearing enthusiasm. There's a reason why you are probably familiar with squirrels no matter where you live in the world; their playful antics and distinctive features make them a beloved subject for artists of all skill levels. Whether you're a seasoned illustrator or just picking up a pencil, the charm of a squirrel offers endless creative possibilities.
This comprehensive guide will walk you through everything you need to know about squirrel drawing, from understanding their unique anatomy to mastering the delicate textures of their fur and bushy tails. We'll explore foundational techniques, delve into stylistic choices like realistic versus cartoonish depictions, and provide tips to overcome common artistic hurdles. Get ready to transform your blank canvas into a vibrant portrayal of these delightful creatures, learning to draw a squirrel with confidence and creativity.
Table of Contents
- Why Squirrel Drawing Captivates Artists
- Getting Started: Essential Tools for Squirrel Drawing
- The Foundational Steps of Squirrel Drawing
- Mastering Fur and Tail Details in Squirrel Drawing
- Exploring Different Styles: Realistic vs. Cartoon Squirrel Drawing
- Common Challenges and How to Overcome Them in Squirrel Drawing
- Beyond the Basics: Advanced Tips for Your Squirrel Drawing
- Showcasing Your Squirrel Drawing Art
Why Squirrel Drawing Captivates Artists
The appeal of squirrel drawing lies in their dynamic nature and expressive features. These small mammals are constantly in motion, whether they are burying nuts, scaling trees, or engaging in playful chases. This inherent liveliness provides a wealth of inspiration for artists looking to capture movement and personality in their work. Their bushy tails, nimble paws, and bright, inquisitive eyes offer distinct characteristics that are both challenging and rewarding to render.
Beyond their physical attributes, squirrels evoke a sense of charm and nostalgia for many. They are a common sight in urban and rural environments alike, making them universally recognizable and relatable subjects. For beginners, their relatively simple body structure, built upon fundamental shapes, makes them an accessible entry point into animal illustration. For more experienced artists, the intricate details of their fur, the subtle nuances of their posture, and the expressive quality of their faces provide ample opportunity for advanced rendering techniques. Learning to draw a squirrel allows you to connect with nature and translate its beauty onto paper, fostering both observation skills and artistic precision.
Understanding Squirrel Anatomy for Drawing
To create a convincing squirrel drawing, a basic understanding of their anatomy is crucial. While you don't need to be a zoologist, knowing the general proportions and key features will greatly enhance your artwork. Squirrels, despite their varied species (there are more than 200 known species worldwide, each with slight variations), share common anatomical traits. They possess a compact body, relatively short legs, and a prominent, often bushy tail that can be as long as their body. This tail serves multiple purposes: balance, warmth, and even communication.
Their heads are small in proportion to their bodies, with distinct muzzles, prominent eyes, and pointed ears. Their front paws are agile, almost hand-like, perfect for gripping and holding food, while their hind legs are stronger for jumping and climbing. When you're embarking on a squirrel drawing, consider these elements. Observe how their spine curves when they sit or stand, how their legs bend, and how their tail flows. Paying attention to these details, even if you're aiming for a cartoonish style, will lend credibility and life to your sketch. This foundational knowledge allows you to construct the body, head, ears, eyes, nose, tail, and feet accurately, making your drawing more believable and dynamic.
Getting Started: Essential Tools for Squirrel Drawing
Before you dive into the delightful world of squirrel drawing, gathering the right tools can make a significant difference in your experience and the quality of your output. You don't need an elaborate art studio, but a few key items will set you up for success, especially if you're learning to draw a squirrel with a pencil step by step. Here’s what you’ll typically need:
- Pencils: A range of graphite pencils is ideal. Start with an HB for initial sketches, a 2B or 4B for darker lines and shading, and perhaps a 6B or 8B for rich blacks and deep shadows. Mechanical pencils can also be useful for fine details.
- Erasers: A kneaded eraser is excellent for lifting graphite gently without smudging, and a vinyl or plastic eraser (like a Staedtler Mars Plastic) is great for precise corrections and clean edges.
- Paper: Choose drawing paper that has a slight "tooth" or texture, which helps the graphite adhere better. Sketch pads or individual sheets of Bristol board are good options. Avoid very smooth paper, as it can be difficult to layer tones.
- Blending Tools (Optional): Tortillons (blending stumps) or cotton swabs can help create smooth transitions and subtle shading, especially when rendering fur.
- Reference Images: While not a physical tool, high-quality reference photos of squirrels in various poses are invaluable. They help you observe their anatomy, fur patterns, and expressions accurately.
With these basic supplies, you're well-equipped to embark on your squirrel drawing journey. Remember, the tools are merely extensions of your hand and eye; practice and observation are your most powerful assets.
The Foundational Steps of Squirrel Drawing
Every successful squirrel drawing begins with a solid foundation of basic shapes. This approach simplifies the complex form of the animal into manageable components, making the drawing process less intimidating and more structured. Whether you aim for a realistic or cartoonish squirrel, starting with these fundamental shapes is key. Follow the ovals, circles, and lines to create the initial structure, which you can then refine into your desired style.
Constructing the Body and Head
The initial phase of your squirrel drawing involves laying down the core shapes that define its posture and proportions. Think of a squirrel's body as a series of connected ovals and circles.
- Start with the Torso: Begin by lightly sketching a large oval for the main body. This will be the largest shape and will dictate the overall size and orientation of your squirrel.
- Add the Head: Above and slightly to the front of the body oval, draw a smaller circle or oval for the head. Consider the angle of the head relative to the body – is the squirrel looking up, down, or straight ahead?
- Connect the Shapes: Gently connect the head to the body with two curved lines to form the neck. This step starts to give your squirrel a more cohesive silhouette.
- Establish Limbs: Use simple lines or smaller ovals to indicate where the legs will be. Squirrels have relatively short forelegs and slightly longer, stronger hind legs. Pay attention to the joints – knees, elbows, and ankles – as these will define the squirrel's pose.
- Sketch the Tail: Finally, add a large, sweeping curve for the tail, originating from the base of the body oval. This initial line will serve as the backbone for the squirrel's most distinctive feature. Remember, the tail is often as long as the body and very bushy.
This "skeleton" of shapes provides a flexible framework. You can easily adjust proportions and poses at this stage, ensuring your squirrel has the dynamic and balanced form you envision before committing to details. This easy tutorial shows you how to construct the body, head, ears, eyes, nose, tail, and feet, making the process approachable for beginners.
Adding Key Facial Features
Once the basic head shape is established in your squirrel drawing, it's time to bring personality to its face. The eyes, nose, and mouth are critical for conveying expression and making your squirrel appear lively and engaging. This is where your sketch truly begins to come to life.
When you're ready to add some details to the face and head, consider these steps:
- Place the Eyes: Squirrels have relatively large, round eyes that are positioned on the sides of their heads, giving them a wide field of vision. Sketch two small circles for the eyes, paying attention to their placement and how they convey the squirrel's gaze. Adding a small highlight within each eye can make them sparkle.
- Shape the Ears: Use pointed arcs for ears, typically positioned on top of the head. These can be slightly rounded or more triangular depending on the squirrel species and your desired style.
- Define the Muzzle and Cheeks: For its jaw and cheeks, use a horizontal oval or a soft, rounded shape beneath the eyes. This area often appears fuller, especially if the squirrel is depicted with nuts in its mouth.
- Sketch the Nose: Add a small, button nose at the end of the muzzle. It's often a small, dark, inverted triangle or a rounded shape.
- Indicate the Mouth: A simple line can suggest the mouth. If you want to show a characteristic squirrel feature, you can add a large tooth or two protruding from its mouth, especially if it's munching on something.
- Whiskers: Don't forget the whiskers! These thin lines extending from the muzzle add to the squirrel's sensory perception and overall charm.
These details, though small, are vital for creating a cute squirrel sketch with fur, eyes, tail, and nut. They transform simple shapes into a recognizable and endearing creature.
Mastering Fur and Tail Details in Squirrel Drawing
The fur and tail are arguably the most distinctive features of a squirrel, and rendering them effectively can elevate your squirrel drawing from a simple outline to a textured, lifelike portrayal. The key to drawing convincing fur lies in understanding its direction, length, and texture, rather than drawing individual hairs.
Drawing Fur:
- Directionality: Fur doesn't grow uniformly. Observe how it flows over the squirrel's body, typically growing downwards and outwards from the spine. Use short, overlapping strokes that follow the contours of the body.
- Layering: Build up fur texture in layers. Start with a light base layer of strokes, then add darker, more defined strokes on top, focusing on areas of shadow and where the fur clumps together. Vary the pressure on your pencil to create different values.
- Value and Texture: Use different pencil grades to create depth. Lighter pencils (HB, 2B) for highlights and softer fur, and darker pencils (4B, 6B) for shadows and denser areas. Avoid drawing harsh outlines; let the fur strokes define the edges of the squirrel's body.
- Subtlety: Fur isn't uniform in color or texture. Look for subtle shifts in tone and areas where the fur might be slightly ruffled or matted.
Drawing the Tail: The tail is the squirrel's magnificent plume and requires special attention.
- Volume and Shape: Start with the broad, sweeping curve you established earlier. Then, build up the volume of the tail using a series of overlapping, feathery strokes. Think of it as a large, fluffy brush.
- Bushiness: The tail is incredibly bushy. Use long, flowing, slightly irregular strokes that extend outwards from the central line of the tail. Don't make the edges too neat; natural fur is often uneven.
- Movement: Consider the squirrel's pose. Is the tail held high, curled over its back, or trailing behind? The direction and curve of the tail can add a lot of dynamism to your squirrel drawing.
- Shadows and Highlights: Just like the body fur, use shading to give the tail depth and make it appear three-dimensional. The underside of the tail will likely be darker, while the top might catch more light.
By focusing on these details, you can create a squirrel sketch with fur, eyes, tail, and nut that truly pops off the page, capturing the essence of these furry creatures.
Exploring Different Styles: Realistic vs. Cartoon Squirrel Drawing
One of the joys of squirrel drawing is the versatility of styles you can explore. From highly detailed, lifelike renditions to whimsical, exaggerated cartoon characters, squirrels lend themselves well to various artistic interpretations. Understanding the differences and techniques for each style can help you decide which path to take for your next piece.
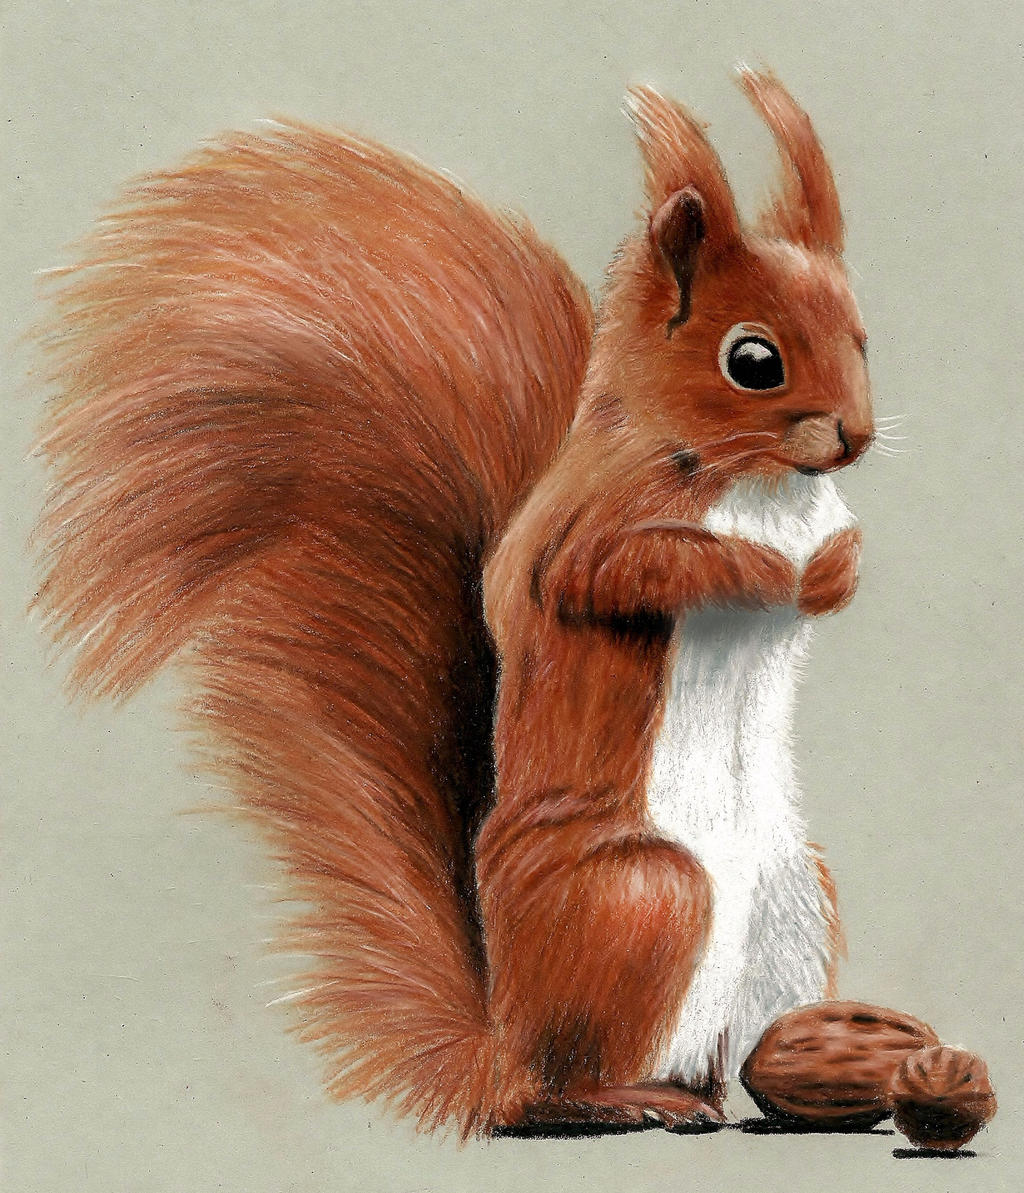
- Realistic Squirrel Drawing: This style focuses on capturing the squirrel's appearance as accurately as possible. It involves meticulous attention to anatomical proportions, the texture of fur, the glint in the eyes, and the subtle variations in their coloration. Realistic drawings often use a full range of values, from deep shadows to bright highlights, to create a sense of depth and three-dimensionality. The goal is to make the viewer feel as though they could reach out and touch the squirrel. This approach often requires more time and patience, as well as a keen eye for observation.
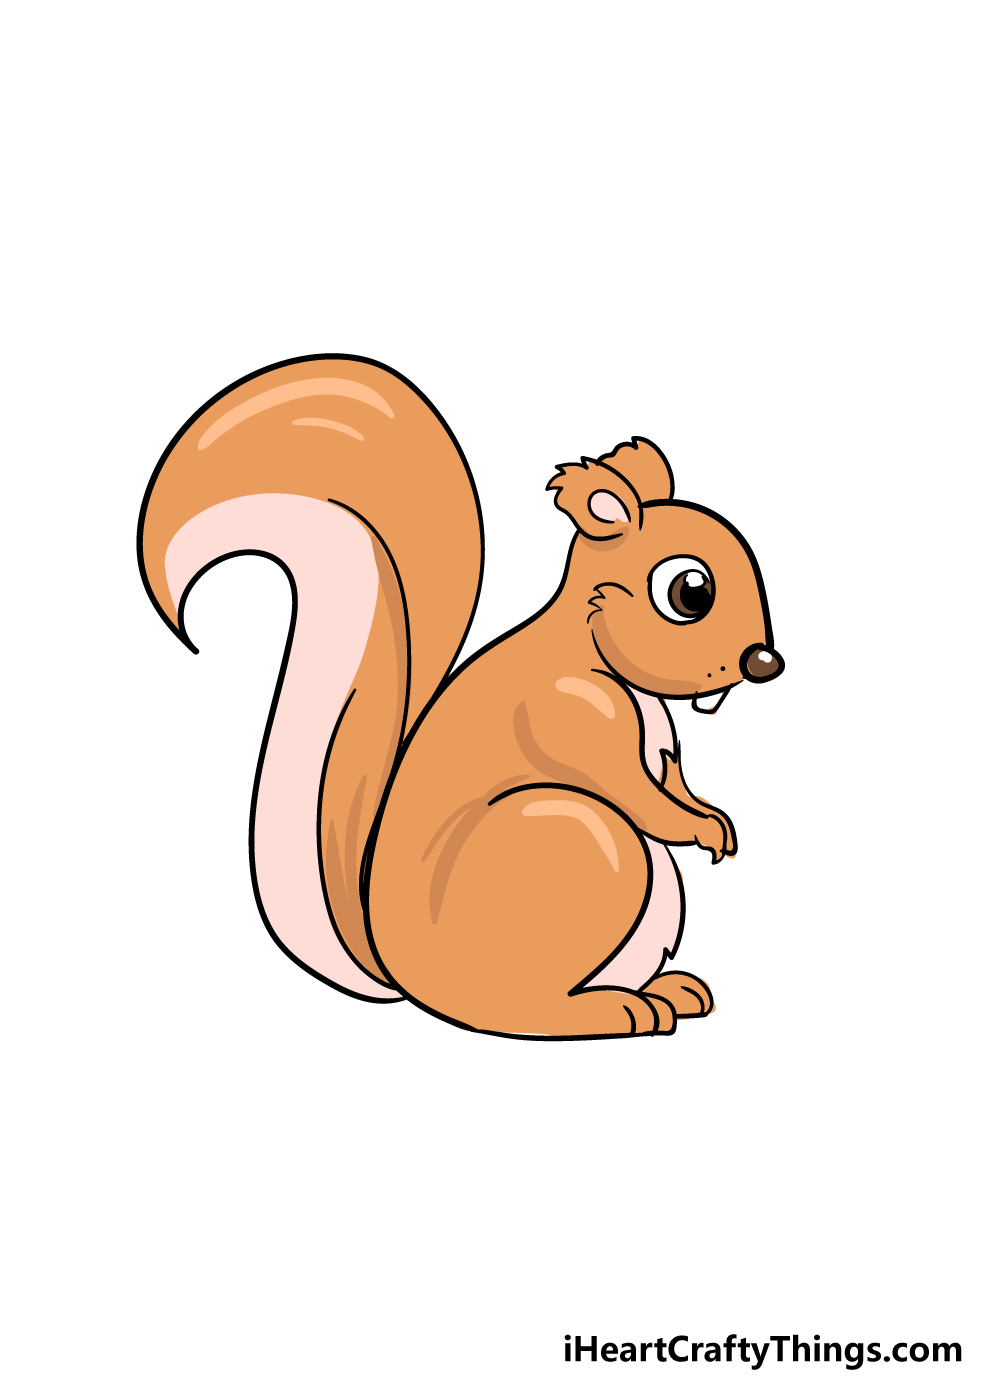
- Cartoon Squirrel Drawing: In contrast, cartoon squirrels prioritize expression, simplified forms, and often exaggerated features. The aim is not necessarily photographic accuracy but rather to convey personality, humor, or a specific emotion. Cartoon squirrels might have larger eyes, smaller bodies, or more expressive poses. Lines are often bolder, and colors can be more vibrant or imaginative. This style is fantastic for beginners and children, as it allows for more creative freedom and less pressure to be perfectly precise. See pictures and descriptions of realistic, cartoon, and funny squirrels for beginners and children to get inspired.
Both styles have their unique charm and challenges. Realistic drawing hones your observational skills and technical precision, while cartoon drawing fosters creativity and the ability to convey character through simplified forms. You can even combine elements, creating a semi-realistic squirrel with a touch of cartoonish charm.
Bringing Life to Your Realistic Squirrel Drawing
Achieving a truly lifelike squirrel drawing goes beyond just accurate proportions and fur texture; it's about infusing your subject with a sense of vitality and presence. Here are some advanced tips to make your realistic squirrel drawing truly come alive:
- Capturing the Gaze: The eyes are the windows to the soul, even for a squirrel. Pay close attention to the highlights in the eyes. A small, well-placed white dot can simulate the reflection of light, making the eyes appear wet, alive, and alert. The direction of the gaze also conveys a lot about the squirrel's focus or emotion.
- Dynamic Poses: Squirrels are rarely static. Choose a reference photo that captures a dynamic pose – perhaps one mid-leap, holding a nut, or peering curiously. Emphasize the curves of the spine, the tension in the muscles, and the flow of the tail to convey movement and energy.
- Adding Environmental Context: A squirrel rarely exists in a vacuum. Adding subtle hints of its environment – a branch, a leaf, or a patch of grass – can ground your drawing and add to its realism. These elements don't need to be highly detailed but should suggest the squirrel's natural habitat.
- Light and Shadow Play: Understanding how light falls on the squirrel's form is crucial for realism. Identify your light source and consistently apply shadows and highlights. This creates depth and makes the squirrel appear three-dimensional. Cast shadows beneath the squirrel also help anchor it to the surface.
- Subtle Details: Look for the tiny details that add authenticity: the texture of their tiny claws, the slight variations in fur color, the way their whiskers curl, or even a small piece of dirt on their nose. These minute observations contribute significantly to the overall realism.
- Expression: Even without human-like expressions, squirrels convey emotion through their posture, the tilt of their head, and the alertness of their eyes. Try to capture that fleeting moment of curiosity, determination, or mischief.
By focusing on these elements, your squirrel drawing will transcend a mere depiction and become a captivating piece of art that truly brings the creature to life.
Common Challenges and How to Overcome Them in Squirrel Drawing
Even with a step-by-step guide, you might encounter some common hurdles when working on your squirrel drawing. Recognizing these challenges and knowing how to approach them can save you frustration and improve your results significantly.
- Proportion and Anatomy: One of the most frequent issues is getting the proportions right. A head that's too large, legs that are too short, or a tail that lacks volume can make your squirrel look unnatural.
- Solution: Start with light, basic shapes (ovals, circles) and continually compare them to your reference image. Use negative space (the space around the squirrel) to help judge proportions. Don't be afraid to erase and redraw these foundational shapes until they feel right.
- Drawing Convincing Fur: Many beginners struggle with making fur look soft and textured rather than stiff or like spaghetti.
- Solution: Avoid drawing individual hairs. Instead, use short, directional strokes that follow the contours of the body. Layer your strokes, building up density and value. Use a kneaded eraser to lift highlights and create a sense of fluffiness.
- Capturing the Tail's Bushiness: The tail is often either too flat or too messy.
- Solution: Think of the tail as a large, fluffy plume. Use long, flowing, slightly irregular strokes that extend outwards from the central axis of the tail. Vary the length and direction of these strokes to create a natural, voluminous appearance.
- Making Eyes Expressive: Flat, lifeless eyes can make your squirrel drawing seem dull.
- Solution: Focus on the highlights. A well-placed, sharp highlight will instantly add sparkle and life. Also, consider the slight curve of the eyelid and the subtle shading around the eye to give it depth.
- Conveying Movement: Squirrels are active creatures, and a static drawing can feel uninspired.
- Solution: Choose dynamic reference photos. Emphasize the curves of the spine, the tension in the limbs, and the sweep of the tail. Even subtle shifts in weight can suggest movement.
Remember, every artist faces challenges. The key is to approach them with patience and a willingness to learn. Learn to draw a squirrel with a pencil step by step in this easy and fun tutorial, and don't be discouraged by initial imperfections.
Beyond the Basics: Advanced Tips for Your Squirrel Drawing
Once you've mastered the foundational techniques of squirrel drawing, you might be ready to push your skills further and add more sophistication to your artwork. These advanced tips can help you create truly compelling and unique squirrel illustrations.
- Experiment with Mediums: While pencils are excellent for learning, try exploring other mediums. Colored pencils can add vibrant realism, pastels offer soft, painterly effects for fur, and ink can create bold, expressive lines for a more stylized approach. Each medium presents new challenges and opportunities for texture and tone.
- Study Light and Shadow More Deeply: Go beyond basic shading. Understand how different light sources (e.g., direct sunlight, diffused light, backlighting) affect form and create specific moods. Practice rendering subtle transitions from light to dark and identifying reflected light. This mastery of chiaroscuro will make your squirrel drawing incredibly dimensional.
- Focus on Composition: A strong composition can make even a simple squirrel drawing captivating. Consider the rule of thirds, leading lines, and how the squirrel is placed within the frame. Should it be centered, or off-center to create more visual interest? What elements will be in the foreground or background?
- Exaggerate for Effect (Even in Realism): Sometimes, to make a feature stand out, you might subtly exaggerate it without sacrificing realism. A slightly bushier tail, a more alert eye, or a more pronounced curve in the spine can enhance the squirrel's character and dynamism.
- Incorporate Storytelling: What is your squirrel doing? Is it hiding a nut, peering from a tree, or interacting with another animal? Adding a narrative element, even a subtle one, can make your squirrel drawing more engaging and memorable. Follow the instructions and examples to create your own cute squirrel sketch with fur, eyes, tail and nut, and think about the story it tells.
- Practice Gesture Drawing: Squirrels are often in motion. Quick gesture drawings (short, rapid sketches focusing on movement and overall form) can help you capture their energy and fluidity, even if you're aiming for a detailed final piece.
- Background and Environment: Instead of just drawing the squirrel, consider its habitat. A blurred background can help the squirrel stand out, while a detailed environment can add context and depth.
By integrating these advanced techniques, you can move beyond simply replicating a squirrel and begin to create art that truly reflects your unique vision and skill. Learn more about the squirrel drawing process and continually challenge yourself.
Showcasing Your Squirrel Drawing Art
After investing time and effort into your squirrel drawing, the next exciting step is to share your creation with others. Showcasing your art is not just about receiving praise; it's an invaluable part of the learning process, offering opportunities for feedback, inspiration, and connection within the artistic community. Learn how to draw a squirrel with us, and we encourage you to share your art!
- Online Platforms: The internet offers a vast array of platforms for artists. Websites like Instagram, DeviantArt, ArtStation, and even Pinterest are excellent for sharing your work with a global audience. Use relevant hashtags like #squirreldrawing, #animalart, #pencildrawing, or #wildlifeart to reach interested viewers.
- Art Communities and Forums: Join online art communities or forums where you can post your work, receive constructive criticism, and engage with fellow artists. These spaces are often supportive and can provide valuable insights for improvement.
- Local Exhibitions or Art Fairs: If you're feeling confident, look for local art shows, community center exhibitions, or craft fairs. Displaying your physical artwork can be a rewarding experience and a chance to connect with art lovers in person.
- Personal Website or Blog: As you create more art, consider setting up your own website or blog. This gives you a dedicated space to showcase your portfolio, write about your artistic journey, and even offer prints or commissions.
- Seek Feedback: When sharing, be open to constructive criticism. Ask specific questions about what viewers liked, what could be improved, or how your squirrel drawing makes them feel. This feedback is crucial for growth.
- Celebrate Your Progress: Remember to celebrate your own progress! Look back at your earlier squirrel drawings and compare them to your latest creations. Acknowledging how far you've come is a powerful motivator.
Sharing your squirrel drawing is a way to inspire others, build your confidence, and become a more well-rounded artist. Don't let fear hold you back; every piece of art you create is a step forward in your artistic journey.
Conclusion
From their charming antics to their intricate fur and bushy tails, squirrels offer an endless source of inspiration for artists. This guide has taken you through the essential steps of squirrel drawing, from understanding their fundamental anatomy and constructing their forms with basic shapes to mastering the delicate details of fur and expression. We've explored the differences between realistic and cartoon styles, provided solutions for common drawing challenges, and offered advanced tips to elevate your artwork.
The journey of learning to draw a squirrel is a rewarding one, enhancing your observational skills, technical precision, and creative expression. Remember that practice is key, and every line you draw brings you closer to mastering your craft. Now that you're equipped with the knowledge and techniques, it's time to pick up your pencil and bring these adorable creatures to life on paper. We encourage you to start your own squirrel drawing adventure today. Share your creations in the comments below or on social media, and let's inspire each other with the captivating world of squirrel art!