Are you captivated by the striking elegance of spider lilies and eager to translate their unique beauty onto paper? Spider lily drawing offers a rewarding artistic journey, whether you're a seasoned illustrator or just picking up a pencil for the first time. These enchanting flowers, with their distinctive, long stamens and delicate, often vibrant petals, present a wonderful challenge and opportunity for artists to explore form, color, and texture. This guide will walk you through everything you need to know to create stunning spider lily artwork, drawing inspiration from expert tips and community insights.
From understanding their intricate anatomy to mastering shading techniques and exploring different artistic styles, we'll delve deep into the art of drawing spider lilies. Get ready to transform your blank canvas into a breathtaking botanical masterpiece, capturing the essence of these mesmerizing blooms.
Table of Contents
- Getting Started: Your Essential Tools for Spider Lily Drawing
- Understanding the Anatomy of a Spider Lily
- Step-by-Step: How to Draw a Red Spider Lily
- Mastering Shading and Coloring for Lifelike Spider Lily Drawing
- Capturing Detail: Petals, Stamens, and Stems
- Adding Depth: The Importance of Backgrounds
- Exploring Styles: From Realistic to Manga Spider Lily Drawing
- Finding Inspiration and Community for Your Spider Lily Drawing Journey
- Becoming an Expert: Practice and Patience
- Conclusion: Your Artistic Bloom
Getting Started: Your Essential Tools for Spider Lily Drawing
Before you embark on your spider lily drawing adventure, gathering the right tools is crucial. While elaborate setups aren't necessary, having a few key items can significantly enhance your experience and the quality of your artwork. For beginners, a simple pencil and paper are perfectly adequate to start. However, as you progress, you might want to explore other mediums to add vibrancy and depth to your spider lily art.
Here’s a basic list of what you might need:
- Pencils: A range of graphite pencils (e.g., HB, 2B, 4B, 6B) will allow you to create varying line weights and shades. HB is great for initial outlines, while softer leads (B series) are excellent for shading.
- Paper: Choose drawing paper that can handle your chosen medium. Smooth paper is good for fine lines, while slightly textured paper can hold more pigment for colored pencils or pastels.
- Eraser: A kneaded eraser is fantastic for lifting graphite without smudging, and a vinyl eraser is good for precise clean-ups.
- Colored Pencils: If you want to add color, a good set of colored pencils is ideal. As seen in many tutorials, including those demonstrating how to draw a spider lily using colored pencils, they offer excellent control and blendability for capturing the vibrant hues of red spider lilies or the subtle tones of white ones.
- Pens/Inks: For a more defined, graphic look, fine-liner pens or ink pens can be used, especially popular in anime and manga art styles.
- Brushes and Acrylics: For those interested in painting, round brush no.4, angular brush 3/8, and liner brush a are often recommended for acrylic flower painting, including red spider lily painting.
Remember, the best tools are the ones you're comfortable with. Don't feel pressured to buy everything at once; start simple and expand your toolkit as your skills and interests evolve.
Understanding the Anatomy of a Spider Lily
Before you start your spider lily drawing, taking the time to study the anatomy of the flower is paramount. This understanding will empower you to create a realistic and lifelike representation. Spider lilies, scientifically known as Lycoris, are instantly recognizable by their unique structure, which sets them apart from many other flowers.
Typically, spider lilies have a long, slender stem, which can often appear bare before the bloom, adding to their mysterious allure. The most striking features are the petals and the intricate stamens. The petals are often recurved, meaning they curve backward, giving the flower its distinctive, almost explosive appearance. In the center, a cluster of long, delicate stamens extends outwards, resembling spider legs, hence the common name. Be sure to include these elements in your drawing to complete the look.
Red Spider Lilies: A Burst of Vibrancy
The red spider lily (Lycoris radiata) is perhaps the most iconic variety, known for its fiery red petals and equally vivid stamens. When drawing a red spider lily, the challenge and joy lie in capturing its intense color and dynamic form. The petals often have a slightly ruffled or wavy edge, adding to their delicate appearance. The long stamens, usually tipped with yellow pollen, fan out gracefully, creating a sense of movement. Capturing these vibrant colors and the elegant shape of this beautiful flower in your artwork is key.
White Spider Lilies: Subtle Elegance
Drawing white spider lilies can be a rewarding and enjoyable experience, offering a different artistic challenge. While lacking the striking color of their red counterparts, white spider lilies (like Lycoris albiflora) possess a subtle elegance. The focus shifts from vibrant hues to capturing the interplay of light and shadow, and the delicate translucence of the petals. Tips for drawing white spider lilies often emphasize understanding how light interacts with the white surface, creating soft gradients and highlights. By following these tips, you can create beautiful and realistic renditions of these unique flowers, focusing on form and texture over bold color.
Step-by-Step: How to Draw a Red Spider Lily
Many artists seek quick and effective ways to learn new drawing skills. For instance, there are tutorials that claim you can learn how to draw a red spider lily in 5 minutes. While mastering it takes time, these quick guides provide an excellent starting point for a simple spider lily drawing. Let's break down the process into manageable steps, inspired by common tutorial approaches:
- The Basic Outline: Start with light pencil strokes. Begin by sketching the long, slender stem. Then, lightly draw a central point where the petals will emerge. From this point, sketch the basic shape of the petals. Remember that spider lily petals often curve backward. Don't worry about perfection at this stage; focus on getting the general form and flow.
- Adding Petal Detail: Refine the shape of each petal. Make them delicate and slightly elongated, curving outwards. Pay attention to the subtle overlaps and twists. For a red spider lily drawing, you'll want to convey that sense of dynamic movement.
- Sketching the Stamens: This is a defining feature. From the center, draw numerous long, thin lines extending outwards, mimicking the spider-like appearance. These stamens are often longer than the petals themselves. At the end of each stamen, add a small, slightly bulbous anther.
- Initial Shading (Pencil): Once your outline is complete, begin to add basic shading with your pencil. Think about where light would hit the flower and where shadows would naturally fall. This helps give your drawing dimension. For a red spider lily, even in pencil, you can suggest the intensity of its color through darker shading in shadowed areas.
- Refining and Finishing: Go back over your lines, making them cleaner and more defined. Erase any unnecessary construction lines. This tutorial is perfect for beginners and will help you create stunning floral artwork. Attention to detail is key when it comes to drawing a spider lily.
This foundational approach will help you create a solid base for any spider lily drawing, whether you intend to keep it as a pencil sketch or move on to coloring.
Mastering Shading and Coloring for Lifelike Spider Lily Drawing
To truly bring your spider lily drawing to life, mastering shading and coloring techniques is essential. This is where the flower transcends a mere outline and gains depth, texture, and a sense of realism. Follow the expert instructions to create a realistic and lifelike representation of this unique flower with pencils, pens, and colors.
When shading with pencils, control the pressure to create a range of tones from light to dark. This video shows how easy it is to draw spider lily and it shows a clear understanding of how to control the shading. For colored pencils, layering is your best friend. Start with light layers, gradually building up the intensity of the color. For a red spider lily drawing, you'll want to use multiple shades of red, perhaps with hints of orange or even a touch of brown in the deepest shadows, to create a rich, vibrant effect. For white spider lilies, focus on subtle grey or blue tones in the shadows and bright highlights to convey their purity.
Choosing your color palette is a critical step. Observe real spider lilies or high-quality photographs to understand their true colors. Don't just pick a single red; look for the nuances. Are there brighter tips, darker bases, or subtle variations in the stamens? Applying these observations will make your spider lily drawing truly stand out.
Capturing Detail: Petals, Stamens, and Stems
The beauty of a spider lily drawing lies in its intricate details. While the overall form is important, it's the fine elements that truly make the flower recognizable and captivating. Capturing the delicate petals, vibrant colors, and elegant shape of this beautiful flower in your artwork requires close attention.
- Petals: Focus on the way they curl and twist. Each petal might have a slightly different angle or bend. Adding subtle veins or slight imperfections can enhance realism. Remember, they are delicate, so avoid harsh, rigid lines.
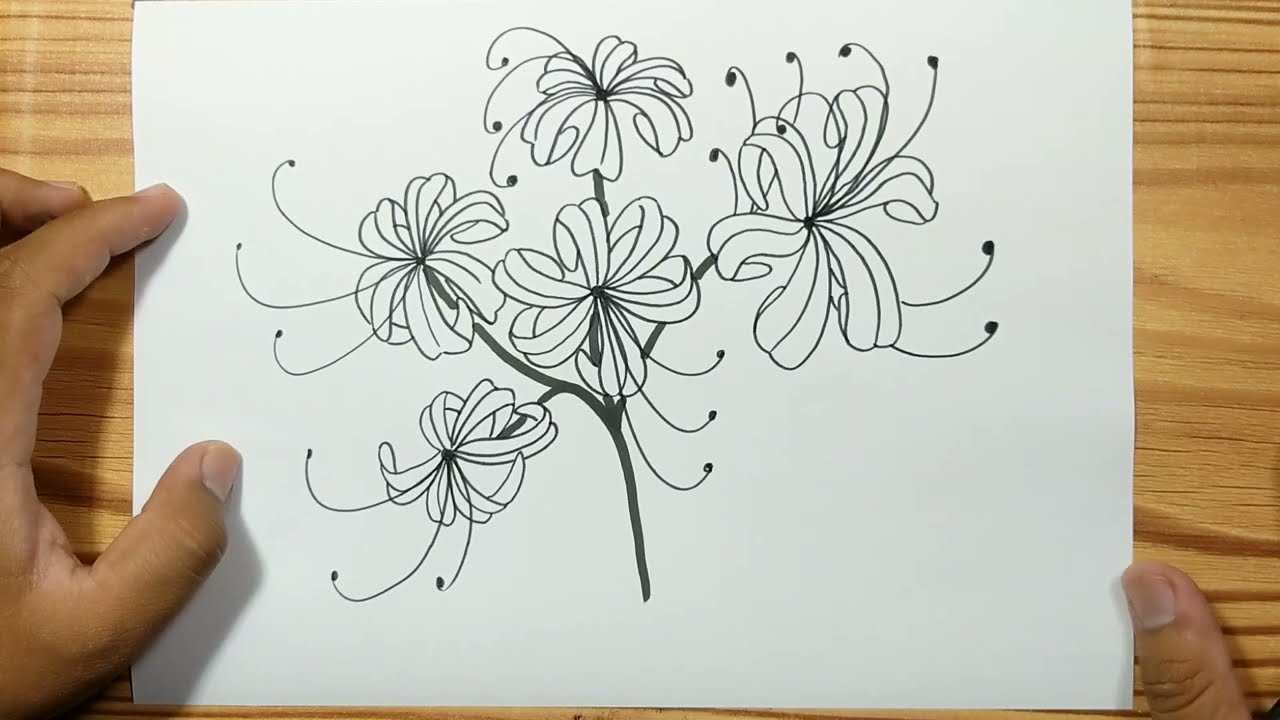
- Stamens: These are arguably the most distinctive feature. Ensure they are long, slender, and appear to radiate from the center. The anthers at the tips should be rendered with care, perhaps with a slightly rough texture to suggest pollen. The reason for this pen project is to show the beauty of the red spider lily's intricate details, particularly its stamens.
- Stem: Spider lilies typically have a long, slender stem. While often overlooked, the stem provides stability and context for the bloom. Pay attention to its thickness and any subtle curves.
By meticulously rendering these components, your spider lily drawing will gain an impressive level of detail and authenticity.
Adding Depth: The Importance of Backgrounds
A spider lily drawing doesn't exist in a vacuum. Adding a background, even a simple one, can significantly enhance your illustration, giving it context and helping the flower stand out. For a finishing touch, consider adding a background to your spider lily drawing.
A simple, muted backdrop can help the flower stand out and give your illustration a polished look. You don't need to draw an elaborate landscape. A soft wash of color, a blurred gradient, or even just a subtle textured area behind the flower can make a world of difference. The key is to ensure the background doesn't compete with the spider lily itself but rather complements it. Consider colors that contrast subtly with the flower – for a red spider lily, a soft green or muted blue might work well. For a white spider lily, a darker, earthy tone could make it pop.
Exploring Styles: From Realistic to Manga Spider Lily Drawing
The beauty of art lies in its versatility. While many aim for realism in their spider lily drawing, the flower's unique form also lends itself wonderfully to various artistic interpretations. Your approach can range from a meticulously detailed botanical illustration to a stylized representation perfect for specific art genres.
Realistic and Detailed Approaches
For those who aspire to create a true-to-life spider lily drawing, the focus remains on accuracy and precision. This involves careful observation of light, shadow, texture, and the specific characteristics of the chosen lily type (red or white). Using colored pencils or even acrylic paints, as seen in many flower painting tutorials, allows for rich layering and subtle color transitions that mimic reality. This style often requires patience and a keen eye for detail, aiming for a lifelike representation that could almost be mistaken for a photograph.
Anime and Manga-Inspired Spider Lily Art
The spider lily holds significant symbolic meaning in Japanese culture, often appearing in anime and manga. This makes it a perfect subject for those who enjoy this art style. A TikTok video from gio_vescovi (@gio_vescovi) showcases a "perfect for anime and manga art lovers" approach to spider lily drawing, often featuring bold ink lines and simplified yet expressive forms. In this style, the emphasis might be on dramatic lines, stylized petals, and perhaps a more exaggerated sense of movement. The vibrant colors of the red spider lily particularly lend themselves well to the bold palettes often found in manga and anime. This approach allows for more creative freedom while still capturing the essence of the flower.
Finding Inspiration and Community for Your Spider Lily Drawing Journey
The digital age has opened up incredible avenues for artists to find inspiration, learn from others, and share their work. For your spider lily drawing endeavors, several platforms stand out as invaluable resources.
- Pinterest: This visual discovery engine is a treasure trove. You can find and save ideas about red spider lily drawing easy, as well as general spider lily drawing. It's fantastic for visual references, different artistic interpretations, and step-by-step tutorials.
- DeviantArt: Want to discover art related to red_spider_lily? Check out amazing red_spider_lily artwork on DeviantArt. This platform hosts a vast community of talented artists, offering a diverse range of styles and skill levels. It's a great place to get inspired and see how others approach the subject.
- TikTok: Beyond quick tutorials like the one from Kiara (@tatsbykiara) showing "learn how to draw a simple spider lily with this easy tutorial," TikTok is a hub for short, engaging art content. Many artists share their process, tips, and finished pieces, providing dynamic inspiration.
- YouTube: As mentioned in the data, channels like Misao offer videos on how to draw a red spider lily in 5 minutes, and other channels provide comprehensive red spider lily drawing tutorials, including painting. These video tutorials are excellent for visual learners, allowing you to follow along step-by-step.
Engaging with these communities can provide motivation, constructive feedback, and a sense of shared passion for art. Don't hesitate to share your own spider lily drawing creations and connect with fellow artists.
Becoming an Expert: Practice and Patience
While some tutorials promise you can "be an expert in drawing by learning to draw in just 5 minutes," true mastery in spider lily drawing, or any art form, comes with consistent practice and patience. These quick tutorials are excellent for building foundational skills and getting started, but they are just the beginning of a longer, rewarding journey.
Every stroke, every shade, and every attempt contributes to your growth. Don't be discouraged by initial imperfections. Instead, view each drawing as a learning opportunity. Experiment with different techniques, explore various color palettes, and try different angles of the spider lily. The more you draw, the more your hand-eye coordination will improve, your understanding of form will deepen, and your unique artistic style will emerge. Remember, the goal is not just to replicate, but to interpret and express the beauty you see.
Conclusion: Your Artistic Bloom
The art of spider lily drawing is a journey filled with discovery, allowing you to capture the intricate beauty and symbolic depth of these extraordinary flowers. From understanding their unique anatomy and choosing the right tools to mastering shading, adding backgrounds, and exploring diverse styles, you now have a comprehensive guide to help you create stunning floral artwork.
Whether you're aiming for a realistic rendition or a stylized anime-inspired piece, the key lies in observation, practice, and embracing your creative spirit. We hope this guide has inspired you to pick up your pencils and bring the captivating spider lily to life on your canvas. What are your favorite tips for drawing delicate flowers? Share your thoughts and your spider lily drawing experiences in the comments below! Don't forget to explore other drawing tutorials on our site to continue your artistic growth.